
3D Settings
Settings → 3D has five tabs: Display, Performance, Models, Animations, and Emotes. The Models tab has an Avatars section and, on supported native surfaces, a Stages section. Together they cover the Live Assistant's visual assets and display settings.
Display
Portrait mode crops the view to upper-body framing. Use Clipping Height to adjust how much of the body is visible. Lower values show more. Higher values crop tighter. You can switch portrait mode on and off without reloading the avatar.
Avatar Shadow is on by default. With No Stage, VAssist renders a soft avatar silhouette behind the character in both 2D and 3D camera modes. It follows the avatar and camera instead of sitting on a ground plane. With a stage active, the same toggle controls the stage's real 3D cast shadow, so it falls onto the environment and moves with its light. Turn this off to hide the avatar shadow.
Character Position controls where the Live Assistant sits on screen (web and extension builds). Set it to Last Location and the position you drag it to is remembered across reloads. Switch it to any preset to snap it back.
| Control | Default | Behavior |
|---|---|---|
| Enable Avatar | On | Turns the Live Assistant on or off. When off, the app falls back to chat-only mode. |
| Avatar Shadow | On | Show a translucent shadow behind the avatar, or cast shadows onto a loaded Stage. |
| Reload Avatar | - | Only when avatar is on. Reloads the scene immediately. |
| Portrait Mode | Off | Only when avatar is on. Switches to tighter upper-body framing. |
| Clipping Height | Model preset | Only when Portrait Mode is on. Lower values show more body. Higher values crop more aggressively. |
| Character Position | Runtime preset | Only on web/extension runtimes. Preset placements including Last Location. |
Sticker border
In Display, the Sticker Border toggle adds a separate outline around the avatar silhouette without changing the model's MMD material outline. It is off by default. When enabled, tune its color, width (1–16 px), edge quality (1–8 samples), and occlusion settings. A wider border or higher edge quality can add GPU work.
The embed host can set initial values with ui.stickerBorder. The same controls remain available in the 3D settings UI unless the host hides or locks that settings area.
Performance
If the Live Assistant runs slowly or drops frames, work through this list in order. Each step has a bigger impact than the next:
- Render Quality → drop to Low. This is usually the biggest single win.
- Frame Rate Limit → cap at
30 FPS. The Live Assistant still looks smooth at 30. - Physics Simulation → turn off. Hair and cloth physics are expensive.
- If you're on Custom quality: drop Anti-Aliasing (MSAA) to
1xand turn off Bloom Effect.
| Control | Default | Behavior |
|---|---|---|
| Physics Simulation | On | Enables hair and cloth physics reactions. |
| Physics Engine | Bullet | Bullet Physics (Recommended) or Havok Physics. Only when Physics is on. |
| Frame Rate Limit | 60 FPS | 15, 24, 30, 60, 90, 120, 144, or Native. Native warns about high-refresh monitors. |
| Render Quality | Medium | Low, Medium, High, Ultra, or Custom. |
Render quality presets
| Preset | Effect |
|---|---|
| Low | Minimal effects, highest performance |
| Medium | Balanced quality, subtle bloom |
| High | Better edges and soft glow |
| Ultra | Strongest built-in quality with full anti-aliasing |
| Custom | Exposes every post-processing control individually |
Custom quality controls
Expand custom quality controls
| Control | Default | Behavior |
|---|---|---|
| Anti-Aliasing (MSAA) | 2x | 1x, 2x, 4x, or 8x. Higher values cost more GPU. |
| FXAA | On | Fast anti-aliasing without MSAA overhead. |
| Bloom Effect | On | Glow on bright areas. Turning it off hides all bloom sliders. |
| Bloom Threshold | 0.9 | How bright an area needs to be to bloom. |
| Bloom Intensity | 0.2 | Bloom strength. |
| Bloom Scale | 0.5 | Bloom contribution scale. |
| Bloom Kernel Size | 32 | 16, 32, 48, or 64 for tighter or wider glow. |
| Contrast | 1.2 | Final image contrast. |
| Exposure | 1.05 | Final image brightness. |
| Saturation | 15 | Color richness, -50 to 50. |
| Reset to Defaults | - | Restores all custom-quality controls to the values above. |
Models
Manages character models and stages together.
Stage selection uses compact rendered previews. Turn Stages on, then choose a preview. Open Stage options for the stage's supported controls. Turn the toggle off to use your saved background again. The same editor is available in UI > Display on supported native surfaces and in the setup wizard when the avatar is enabled. Custom stage import, rename, and deletion are under Custom stages.
Adding a custom avatar
Models must be packaged as a ZIP file. The ZIP must contain the .pmx file plus every texture image it references. The PMX file embeds relative paths to its textures, so those textures need to exist at the same relative paths inside the ZIP. Standard MMD model packages already have this structure. If you downloaded an MMD model, zip the whole folder as-is.
Typical ZIP structure:
MyModel.pmx
tex/
  body.png
  face.png
  hair.png
If textures are missing from the ZIP the import will still succeed but the model will render with gray or transparent surfaces where textures should be.
- Hit Upload PMX Model (ZIP) and select your file.
- Wait for the import. If something is wrong with the package, an error panel will tell you what's missing.
- Find the new model in the list, toggle it as default.
- Go back to Display and hit Reload Avatar (or use the Reload button in the Live Assistant controls).
The built-in VAssist Default model is always available as a fallback. It stays in the list even when a custom model is active.
To control which parts of a model are visible (hide accessories, swap textures, etc.), expand the model's settings chevron. Textures and mesh parts are each listed individually with toggles.
Character models
| Control | Behavior |
|---|---|
| Upload PMX Model (ZIP) | Import a zipped PMX package. Shows progress and an error panel if parsing fails. |
VAssist Default | Built-in model. Active when no custom model is set as default. |
| Settings chevron | Expands texture and mesh-part toggles for that model. |
| Texture buttons | Toggle individual textures on/off, grouped by type. |
| Mesh part buttons | Toggle individual mesh parts on/off, grouped by category. |
| Custom model row | Shows name and file size. Supports rename, delete, and default toggle. |
Stages
Stages are available in Desktop App and Wallpaper modes, and in the Android app and live wallpaper. Floating desktop windows, the web app, extension, and browser integrations do not load stages or show stage controls. Android AR hides both the selected stage and the configured background while the camera view is active. They return when you leave AR.
On a fresh setup, no built-in stage is selected. Turn on Stages and choose one of six studio environments, Aster Observatory, Moss House, or Rainlight Library. Select No Stage to use your background settings instead. Your background selection remains saved when you switch to a stage. If you already have a custom stage saved as the default, it can load until you select No Stage.
Built-in stage previews
These previews show the six quiet studio stages and the three furnished environments.


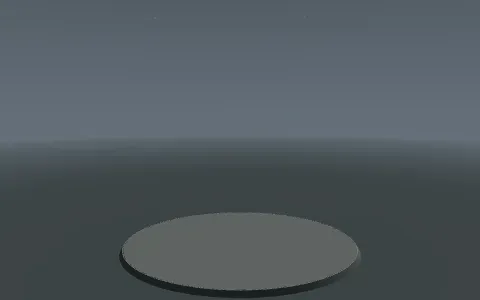
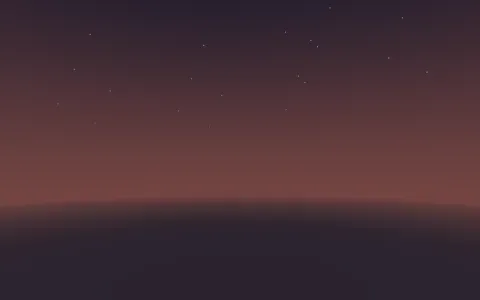

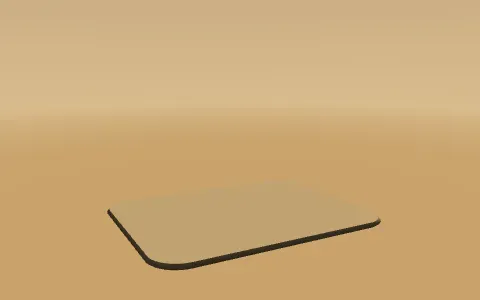
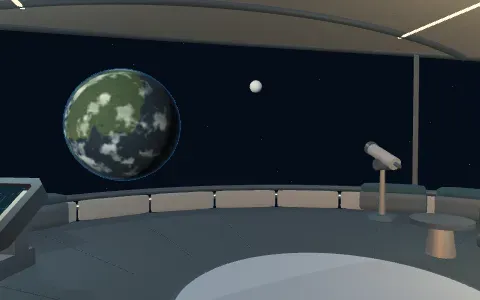
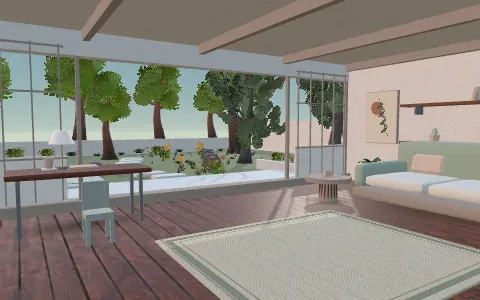
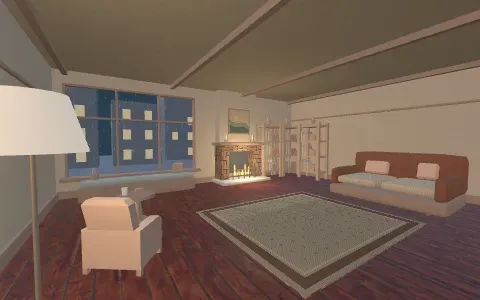
The six quiet stages have distinct palettes: Ink (near-black seamless studio), Paper (light studio), Slate (cool stone plinth), Dusk (violet horizon), Stillwater (deep blue rippling water), and Pebble (warm sandstone base). They follow local time, darken at night, and use subtle stars in dark skies. Ink keeps faint stars by day. Paper stays seamless.
Use Stage options and select Apply in Settings. The Live Assistant's stage button has compact controls that preview and save immediately. Its clock opens a dial that saves and closes on release.
| Control | What it does |
|---|---|
| Season | Follows the local calendar or selects spring, summer, autumn, or winter. Seasonal palettes apply across built-in stages. Effects are petals, pollen, leaves, or snow. |
| Seasonal effects | Toggles particles independently of environment animation. Moss House and Rainlight Library keep weather outdoors. Aster Observatory has seasonal lighting without weather particles. |
| Environment brightness | Adjusts exposure for the stage and avatar. The setting is saved per stage. |
| Lighting and Mood | All built-in stages follow local time or allow manual time on a 00:00–24:00 slider in 15-minute steps. Aster Observatory and Rainlight Library also have named Mood presets. Lighting affects stage lights and supported sky and shadow direction. |
| Animate environment | Toggles supported motion such as stars, water ripples, planetary rotation, rain, and fire. |
| Avatar Shadow | Toggles the stage-cast shadow. With No Stage, it shows the avatar shadow behind the model. |
| Avatar height / floor adjustment | Calibrates room scale and foot contact per avatar without resizing its physics rig. Existing PMX stages keep their placement. |
Portrait mode keeps the room intact and frames the avatar's upper body.
Importing a stage
Use Import to choose a self-contained GLB, a Babylon scene with embedded textures, or a PMX stage ZIP. PMX ZIPs need the stage file and its texture images at their correct relative paths. GLB and Babylon imports cannot depend on separate files that were not included in the import.
Custom stages support selection, renaming, and deletion. Existing imported PMX stages remain available. See the environment art credits for the included assets.
Animations
Combines the motion library with the category-based playback manager. Imported motions don't play until you assign them to at least one animation category.
Importing motions and assigning categories
VMD files do not need to be zipped. Select the .vmd files directly. You can pick multiple files in one go.
- Hit Upload VMD Animations and pick one or more
.vmdfiles. You can import multiple at once. - After upload, find a motion in the list and expand its category chevron.
- Toggle on the animation categories this motion should be used in:
idle,thinking,celebrating,walking, ortalking.
You can assign the same motion to multiple categories. The Live Assistant randomly picks from all enabled motions in a category, so adding more variety means more natural-looking behavior. The default built-in animations stay as a baseline. VAssist won't let you disable the last remaining motion in any category.
The Animation Management section below the library lets you enable or disable individual built-in and custom motions per category without re-importing them.
Motion library
| Control | Behavior |
|---|---|
| Upload VMD Animations | Import one or more VMD files at once. |
| Motion row | Name, size, rename, delete. |
| Category chevron | Opens per-motion category assignment. |
| Animation Categories | Assign a motion to idle, thinking, celebrating, walking, or talking. |
Animation management
One category section per bucket: idle, thinking, celebrating, walking, talking.
| Section element | Behavior |
|---|---|
| Category header | Shows enabled counts for built-in and custom animations. |
| Default Animations | Enable or disable built-in animations in that category. |
| Custom Animations | Enable or disable imported motions assigned to that category. |
| Last-enabled protection | The toggle disables itself if turning it off would leave the category empty. |
Emotes
Emotes are named, triggerable reactions. Each one plays a sound, runs a VMD motion on the avatar, and optionally moves the camera. You trigger them from the live emote panel in the Live Assistant controls.
Creating an emote
You need at least an audio file and a VMD motion file. Camera data is optional but adds a cinematic touch.
- Give the emote a name. This is how it shows up in the panel.
- Optionally add categories (comma-separated tags) to group related emotes together in the filter.
- Upload the audio file.
- Upload the motion VMD file.
- Optionally upload a camera VMD file.
- Hit Upload Emote.
To import many emotes at once from a collection, use Import ZIP Package instead of creating them one by one.
Once an emote is in the library:
- Use category filter to find it by tag
- Toggle visibility to hide an emote from the panel without deleting it. Useful for keeping a library clean without losing assets
- Open the category chevron to set it as an auto-play emote in one of the animation states (
general,idle,thinking,celebrating,walking,talking). The Live Assistant will play it automatically during that state
Emote creation controls
| Control | Behavior |
|---|---|
| Emote Name | Required. |
| Categories | Comma-separated custom category tags. |
| Import ZIP Package | Bulk-imports multiple emotes from a ZIP archive. |
| Upload Audio | Audio source for the emote. |
| Upload Motion | VMD motion file. |
| Upload Camera | Optional VMD camera animation. |
| Upload Emote | Starts creation and shows success or error feedback. |
Emote library
| Control | Behavior |
|---|---|
| Category filter | Filter list to all or a specific category. |
| Delete filtered | Delete every emote in the current filter scope. |
| Emote row | Rename, delete, or toggle visibility. |
| Visibility toggle | Hides/shows the emote in the emote panel without deleting it. |
| Category chevron | Opens auto-play category assignment. |
| Auto-play Categories | general, idle, thinking, celebrating, walking, or talking. |